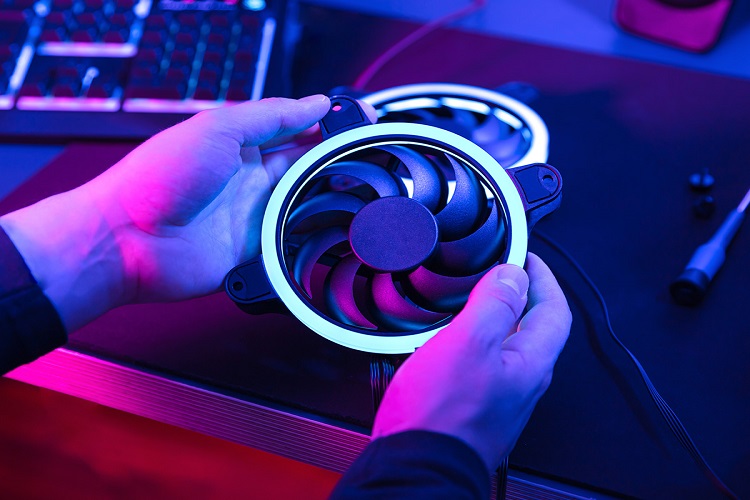
When your computer suddenly starts sounding like a small jet engine, it’s not just annoying — it’s a sign something is wrong. A loud computer fan often points to dust buildup, overworked components, or failing hardware. Ignoring these early warnings may lead to overheating, sluggish performance, or even permanent damage to your CPU or GPU.
If you’ve been searching how to fix a loud computer fan, this guide provides clear, practical steps to diagnose and resolve the issue before it escalates. And if you’re based locally, you can always get quick help through on-site computer repair in Martinborough, Wairarapa, NZ, where technicians can inspect and quiet down your fan safely without you having to move your setup.
Table of Contents
Why Is Your Computer Fan Suddenly So Loud?
Before attempting to repair or replace anything, it’s essential to understand why the noise occurs. Fans are designed to regulate temperature, but when they work too hard, they create excessive noise.
1. Dust and Dirt Buildup
Over time, dust accumulates inside your system, clogging vents and coating the fan blades. This forces the fan to spin faster to compensate for restricted airflow, leading to a noisy hum or grinding sound.
2. Overheating Components
A fan running at full speed is a clear symptom of computer overheating. When the internal temperature rises beyond safe limits, the fan tries to cool the system quickly — producing constant noise even during light tasks.
3. Software or Background Overload
Sometimes, it’s not hardware at fault. Background programs or high CPU usage from software updates can push your system to the limit, causing the fan to ramp up unnecessarily.
4. Worn-Out or Misaligned Bearings
With age, fan bearings wear down or misalign, resulting in rattling, clicking, or whining noises. If left unchecked, it may lead to total fan failure.
Step-by-Step Guide to Fix a Loud Computer Fan Safely
Now that you know the possible causes, let’s go through a detailed step-by-step process to fix a loud computer fan efficiently and safely.
Step 1: Shut Down and Unplug Your System
Never open your desktop or laptop while it’s powered on. Always disconnect from electricity and wait a few minutes to let it cool before proceeding.
Step 2: Open the Casing Carefully
If you’re using a desktop PC, remove the side panel using a screwdriver. For laptops, refer to the user manual for guidance — some models require special tools to access internal fans.
Step 3: Clean the Fan and Vents
Use compressed air to blow out dust from the vents and fan blades. Hold the fan still with your finger while blowing air to avoid over-spinning the blades.
Avoid vacuum cleaners — they can create static electricity and damage internal components.
Pro tip: Clean your system at least once every 3–6 months if you live in a dusty environment.
Step 4: Check for Obstructions and Cable Interference
Loose cables brushing against the fan can create buzzing noises. Reposition or secure them using small cable ties. Also, check for anything lodged near the fan hub.
Step 5: Reapply Thermal Paste (If Overheating Persists)
If your computer fan making noise continues even after cleaning, excessive heat from the CPU might be the culprit. Remove the heatsink carefully, clean off old thermal paste using isopropyl alcohol, and reapply a pea-sized drop of new paste before reseating the heatsink.
Step 6: Monitor System Temperatures
Use free tools like HWMonitor or SpeedFan to check your CPU and GPU temperatures. Ideally, idle temperatures should remain below 50°C.
If your computer still overheats, professional attention may be required — search for a computer technician near me who can inspect it in person.
Step 7: Update BIOS and Drivers
Outdated firmware or drivers can cause your fan control system to malfunction. Visit your manufacturer’s website and install the latest BIOS and chipset drivers to restore proper fan speed management.
What That Fan Noise Is Really Telling You
Each fan sound tells a different story. Identifying it correctly helps you decide whether cleaning or replacement is needed.
| Sound Type | Likely Cause | Fix |
| Whirring / Whooshing | Dust or airflow obstruction | Clean vents and blades |
| Rattling / Clicking | Loose cable or failing bearing | Secure cables, consider replacement |
| Grinding / Screeching | Worn bearings | Replace fan immediately |
| Constant high pitch | Overheating or software overload | Monitor CPU usage, reapply thermal paste |
If you’re not confident handling these tasks yourself, consider an on-site computer repair in Martinborough, Wairarapa, NZ. Local experts can diagnose whether it’s just the fan or if deeper cooling issues exist.
When It’s Time for a Replacement
Sometimes, no matter how much cleaning you do, the fan continues to roar. That’s often a sign the motor or bearings are beyond repair.
Choosing a Replacement Fan
When replacing, ensure:
- Size compatibility: Most desktop fans come in 80mm, 120mm, or 140mm.
- Airflow rating: Measured in CFM (cubic feet per minute). Higher CFM = better cooling.
- Noise level: Look for fans rated under 25 dB for quiet operation.
- Connector type: Check if your motherboard supports 3-pin or 4-pin PWM connectors.
Upgrading for Efficiency
Consider upgrading to modern fluid dynamic bearing fans — they last longer and are quieter than standard sleeve bearings.
You can also install fan controllers or software (like MSI Afterburner) to regulate speed manually.
Why You Shouldn’t Ignore a Loud Fan
A noisy fan is more than an inconvenience. It’s a red flag for potential damage:
- Shortened Component Lifespan: Continuous overheating stresses the CPU and GPU, leading to early failure.
- Thermal Throttling: Your system may automatically slow down performance to reduce temperature.
- Power Inefficiency: A constantly spinning fan increases power draw and reduces battery life in laptops.
- Data Loss Risk: In extreme heat, hard drives or SSDs can fail abruptly.
Ignoring the signs could mean a small maintenance issue becomes a costly repair later — or even total system failure.
Real Example from Martinborough: The Laptop That Sounded Like a Jet
Recently, a customer from Martinborough brought in a laptop that had been running hot and noisy for months. The fan sounded like a small engine during startup. After inspection, the technician found a thick layer of pet hair and dust blocking 70% of the air vents. Once cleaned and the thermal paste reapplied, the laptop ran almost silently again, with CPU temperatures dropping from 85°C to 58°C under load.
If you’re experiencing similar symptoms, local service provider Tech On Road offers on-site computer repair in Martinborough, Wairarapa, NZ. They specialize in diagnosing performance and cooling issues — from fan replacements to full system tune-ups.
How to Prevent Fan Noise from Coming Back
Prevention is always cheaper than cure. Here’s how to minimize the risk of future fan issues:
1. Regular Cleaning
Dust accumulation is the number one cause of loud fans. Use compressed air monthly to clear vents, especially if you keep your PC on the floor.
2. Optimize System Load
Avoid running multiple heavy applications simultaneously. Monitor background processes and set performance modes to “Balanced” instead of “High Performance” when not gaming.
3. Improve Airflow
Ensure your computer has breathing space — never block air vents against a wall or sofa cushion. For laptops, use cooling pads to enhance bottom ventilation.
4. Keep BIOS and Drivers Updated
Modern BIOS versions often include improved fan control algorithms. Updating can reduce unnecessary high-speed spinning.
5. Replace Fans Proactively
If your laptop / pc fan loud persists even after cleaning, replace the fan before it stops working entirely. Waiting until failure could lead to overheating and data loss.
When It’s Time to Call Expert PC Repair
While cleaning and basic troubleshooting can solve most cases, sometimes a persistent loud fan signals deeper issues such as failing power supply units, GPU overheating, or motherboard voltage irregularities.
If your fan remains loud after all steps above, searching for a computer and laptop repair near me can save time and prevent further damage. Certified technicians have thermal imaging tools and diagnostic software that pinpoint the root cause precisely.
In regions like Wairarapa, local users can easily access experienced experts who understand environmental factors — such as humidity and dust — that often accelerate wear on cooling systems.
Keep Your Computer Cool, Quiet, and Protected
A noisy fan isn’t just a background nuisance — it’s your system’s cry for help. By taking early action, you can prevent overheating, extend your computer’s lifespan, and enjoy smoother performance.
Follow the cleaning and diagnostic steps above to fix a loud computer fan before it spirals into major repairs. And if you’re uncertain about opening your machine, there’s no harm in seeking local help. Whether you’re in Martinborough or anywhere in Wairarapa, a skilled computer technician near me can make sure your PC runs quietly, efficiently, and safely.
Your computer deserves care, just like any other investment. Take a few minutes today to inspect it — that small effort could save you hundreds in future repairs.